15 STEPS TO THE PERFECT WILDLIFE POND
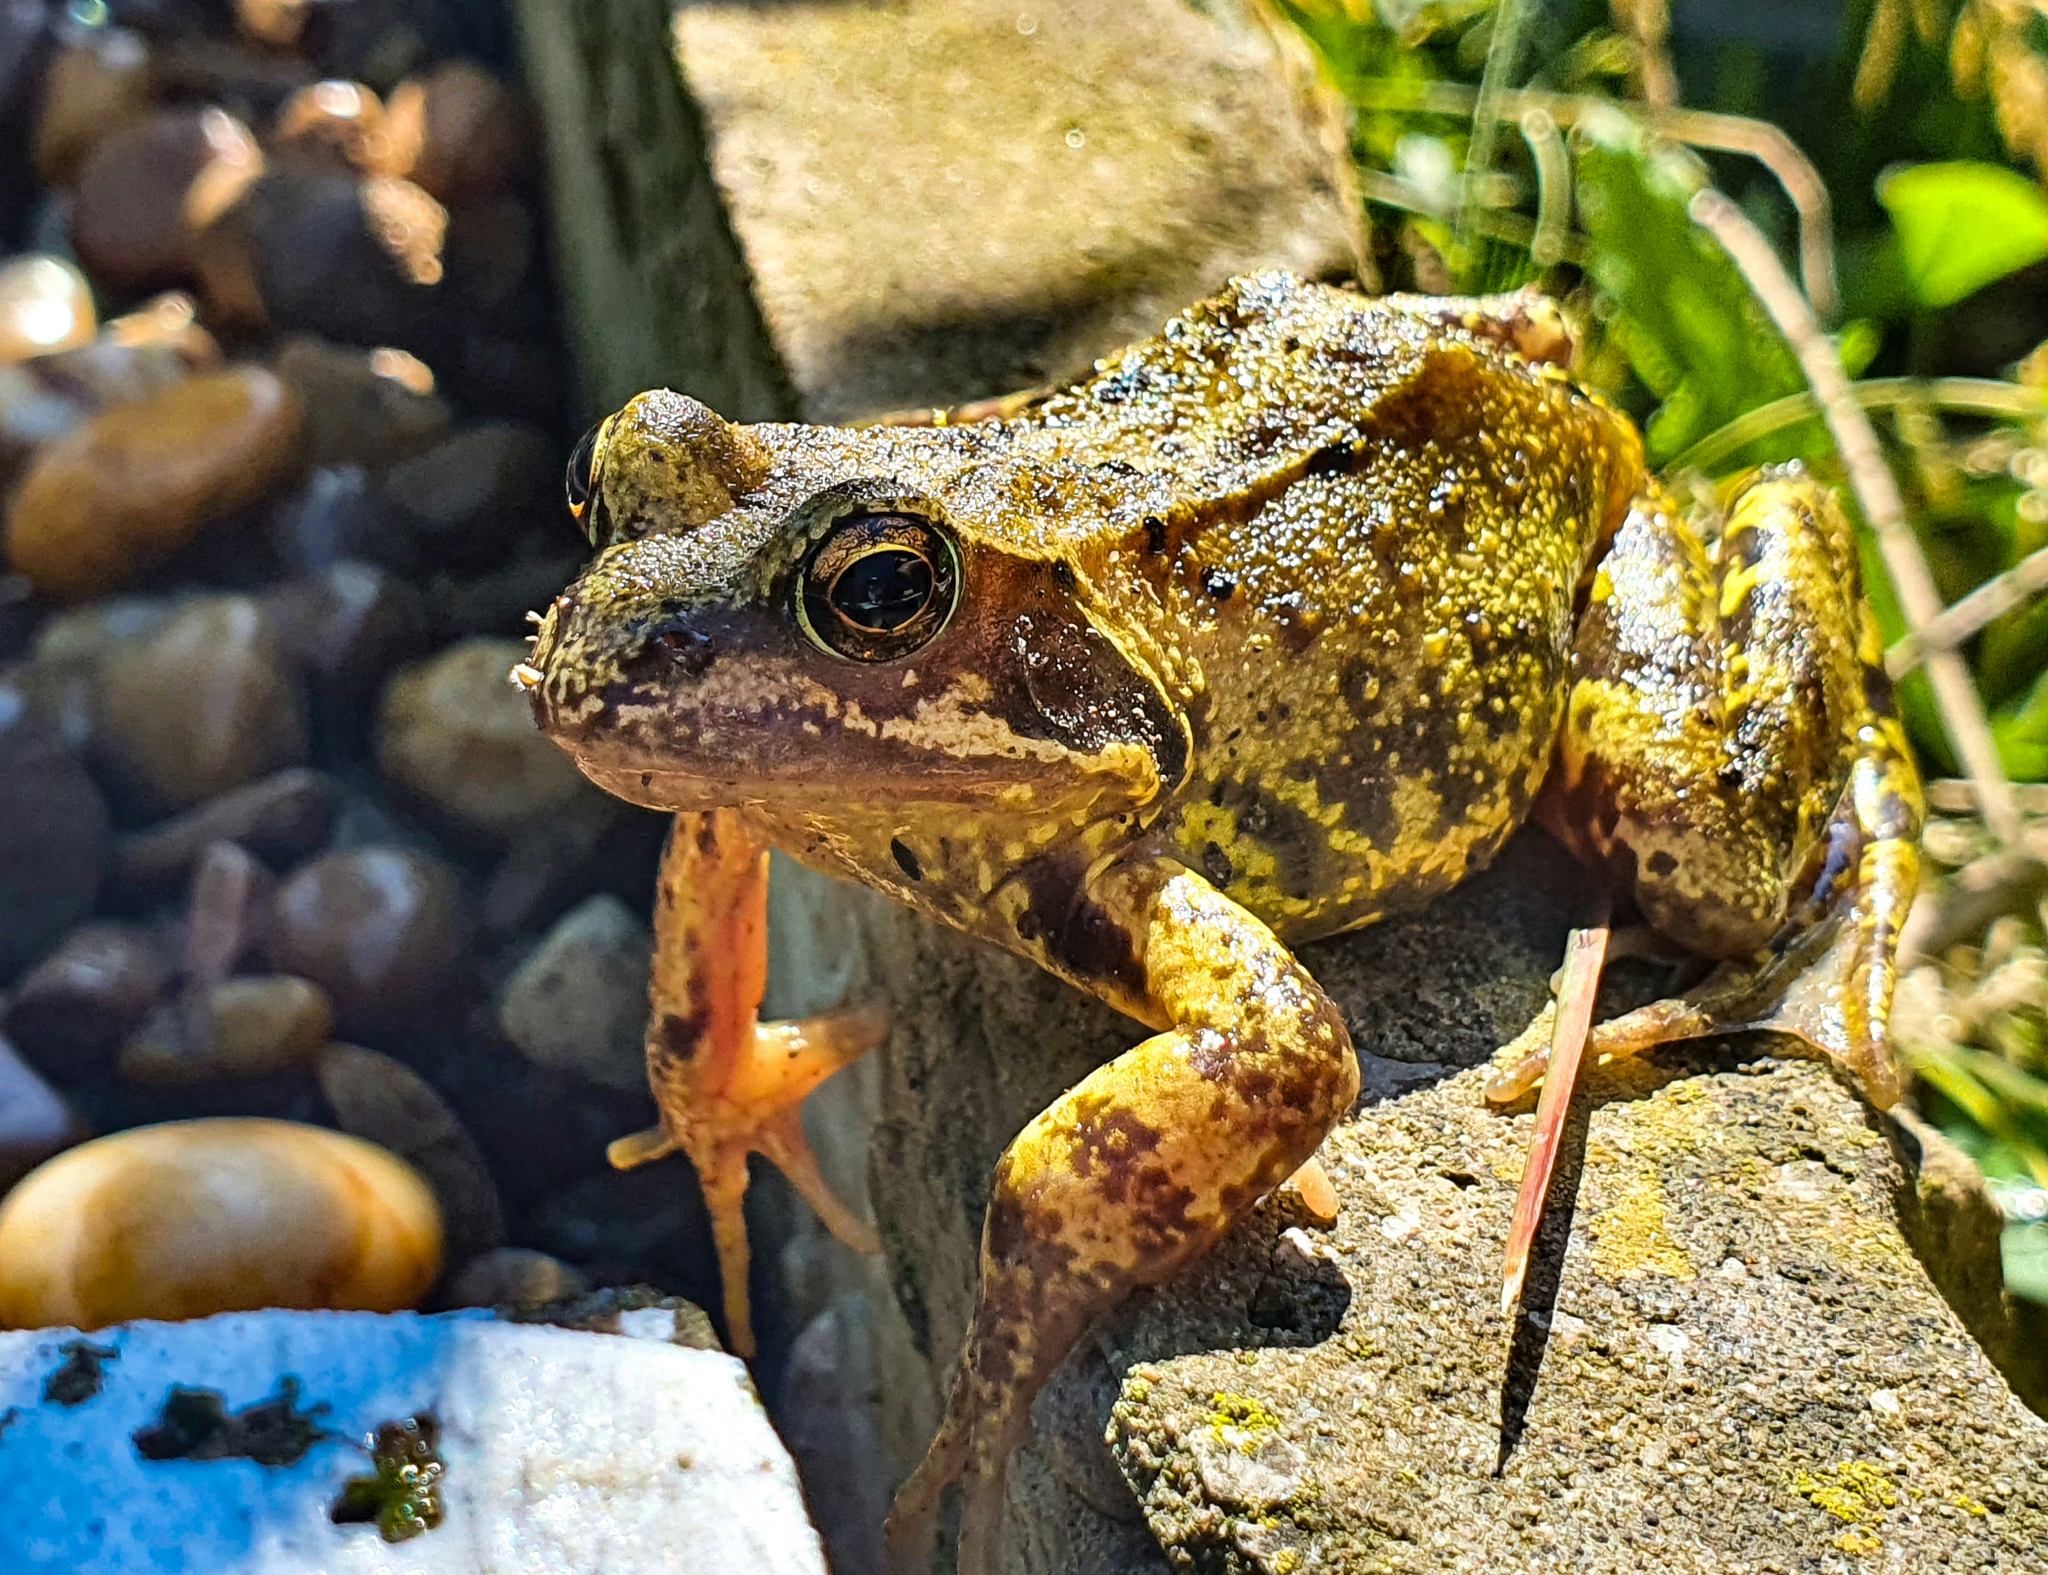
A pond is the number one all-star wildlife addition to your garden. It provides water for birds and mammals to drink, and encourages loads of great, diverse wildlife like pond skaters, water boatmen, frogs, dragonflies, damselflies, and newts.
Within days of filling my pond, I was watching diving beetles, various larvae, water boatmen and frogs, and squirrels, birds, foxes and hedgehogs drink from it, even in my suburban garden. Nine months after creating my pond, I had frogspawn, and my pond meant there were more flying insects in my garden, which means I get to watch bats swooping around my garden at dusk, which is just magical!
Here’s how to build the best wildlife pond:
THE DESIGN
Before we get to your 15 steps to the perfect pond, the first thing you need to do is decide where to put your pond, what shape to make it, and how big to have it.
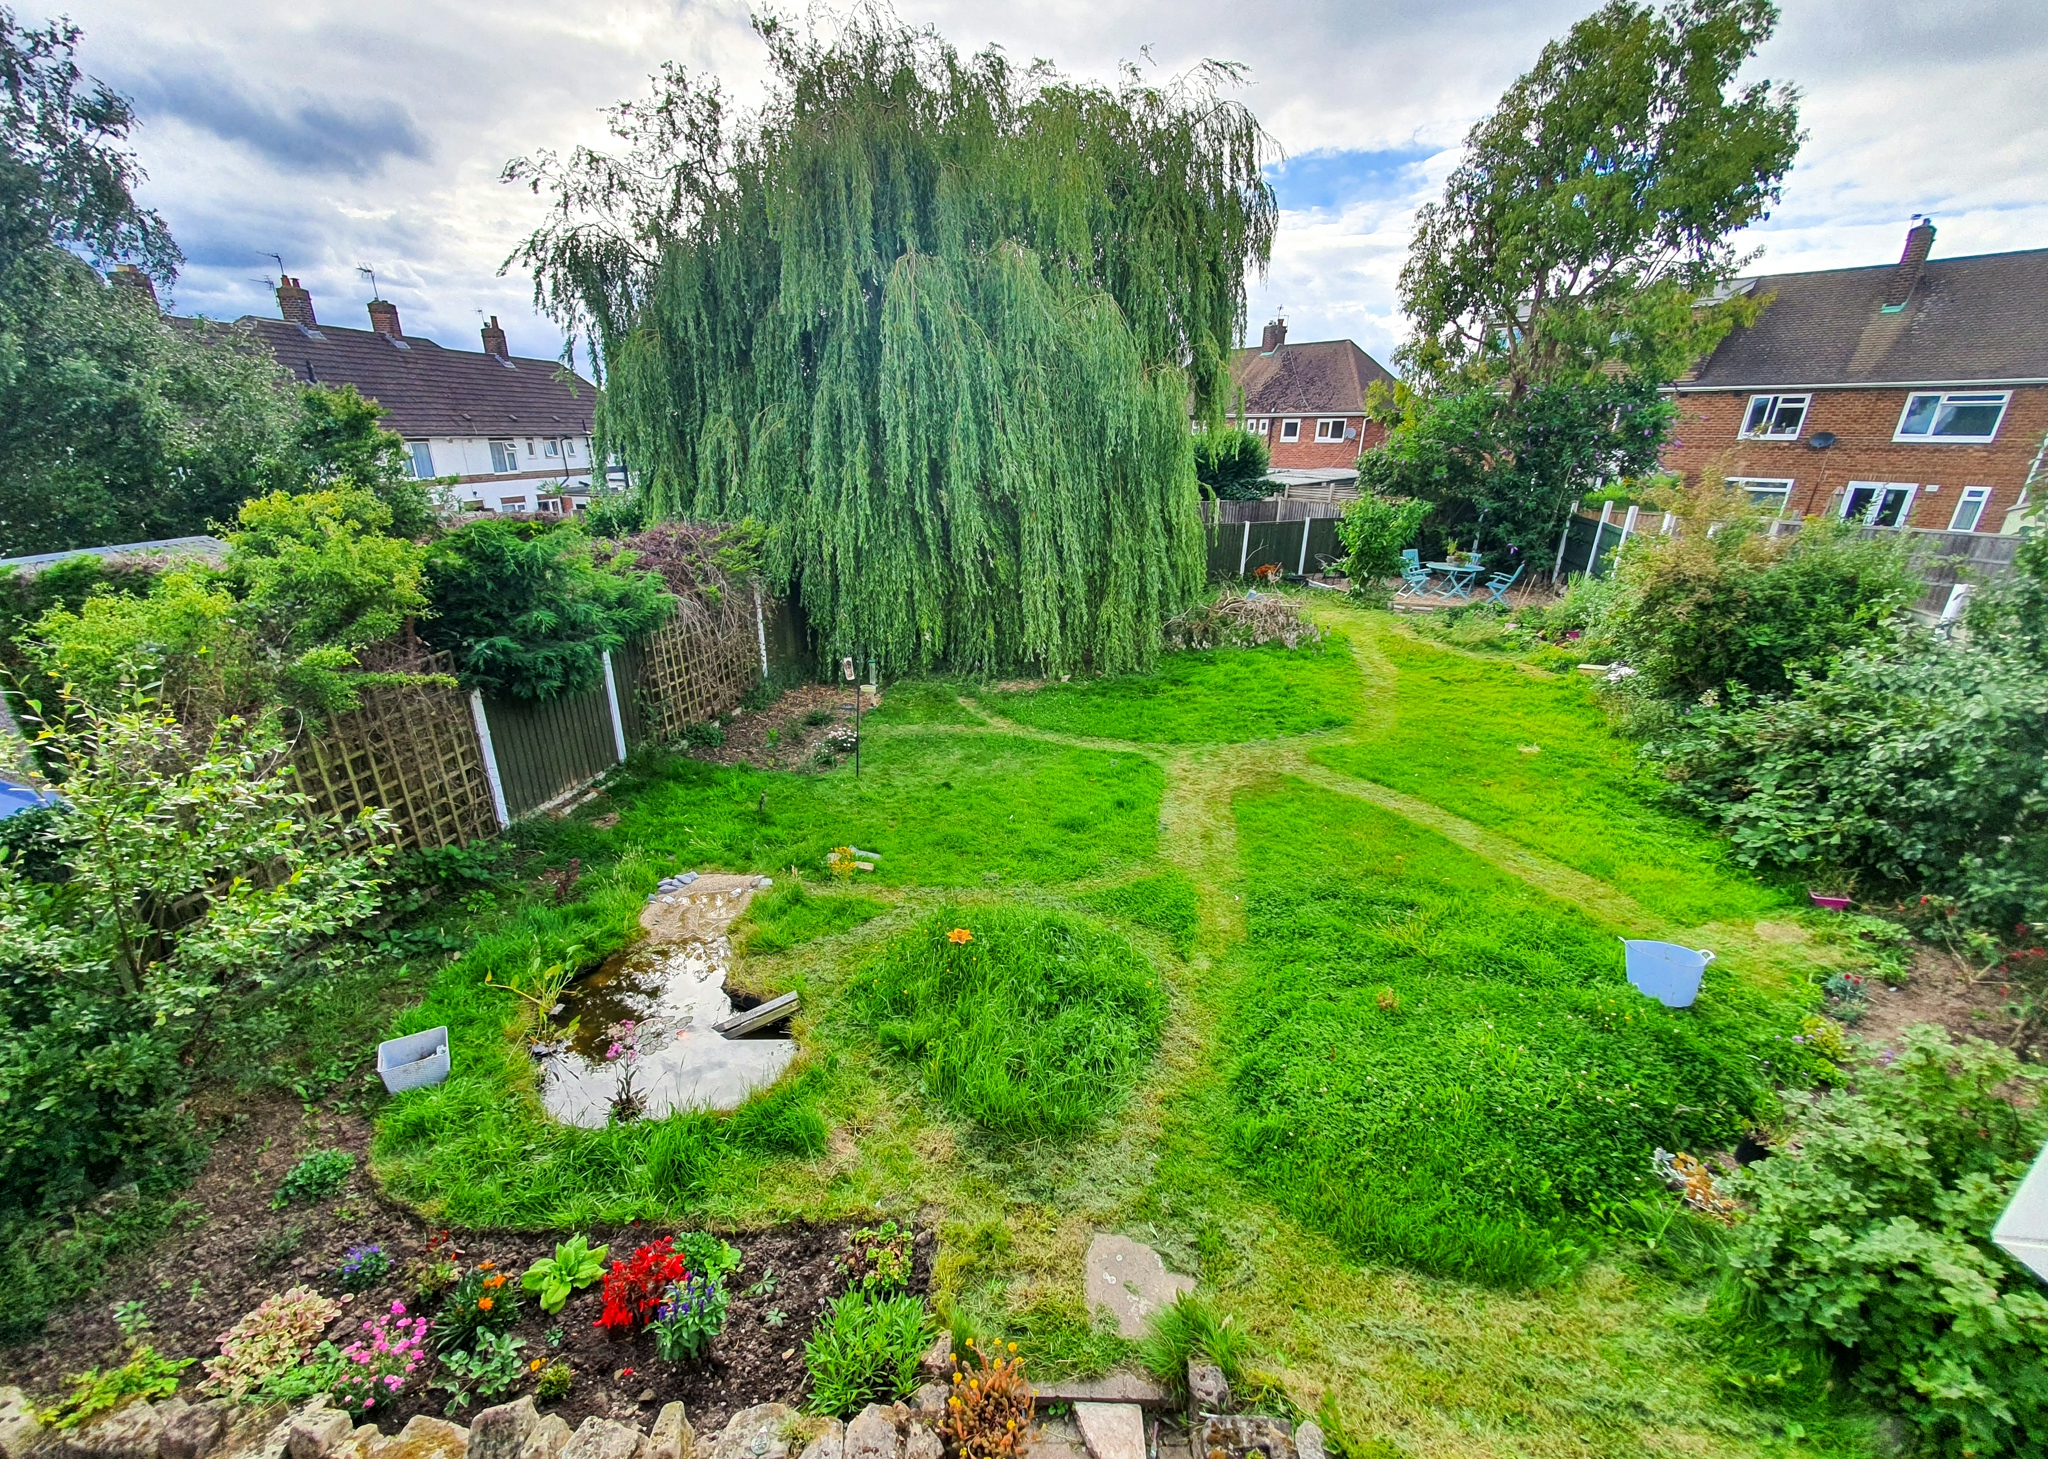
There are various (often contradictory) commentaries out there on the optimal place and size for a pond, but it doesn’t really matter - the wildlife will love it wherever you put it and whatever it looks like.
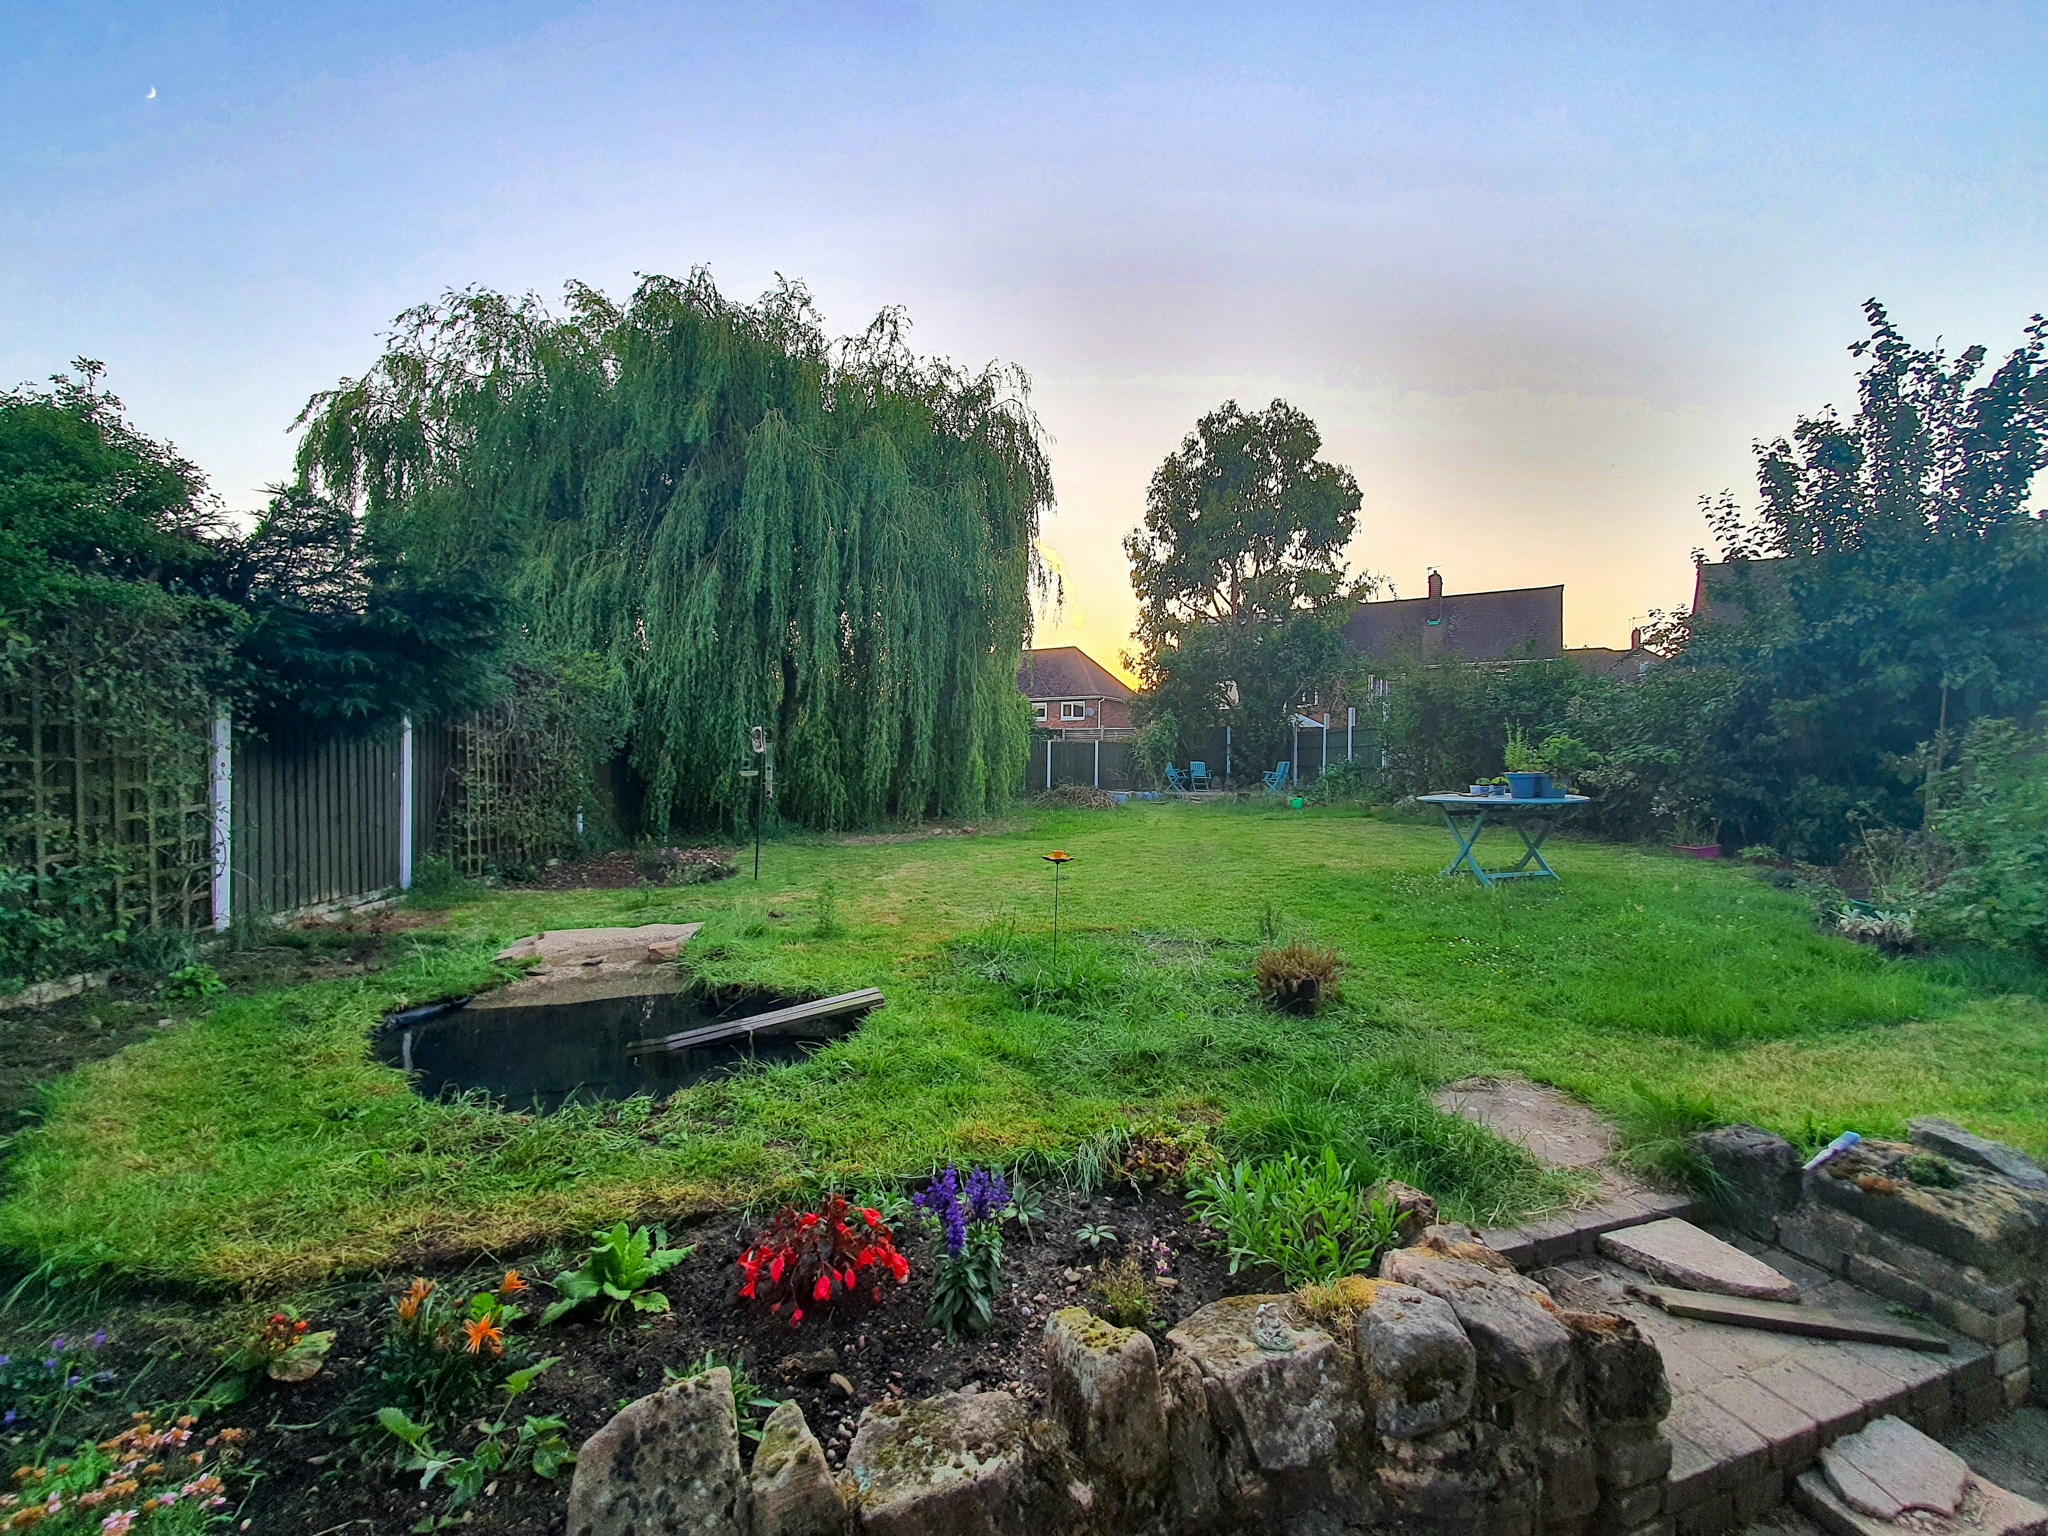
I have a pond that’s in partial sun and partial shade, a pond that is in full sun almost all of the day, and a bucket pond that is in shade most of the day - all three of them attract wildlife!
Having said that, it’s best not to put it directly under a deciduous tree, because the leaves will fall into the pond and silt it up. You don’t want to have to net your pond to keep the leaves out, because nets pose serious risks to birds and hedgehogs. It’s okay to have it near a deciduous tree just as long as it’s not likely to be inundated with dropped leaves - one of my ponds gets some leaves from my willow tree in it, and it’s fine.
It’s also best not to have it in a place that is always in the shade or always in the sun, but as I said, I’ve got successful ponds in both these types of location, so don’t get hung up on it.
The best ponds for wildlife are edged with plants or grass, as this provides cover, so try to plan your pond somewhere you can plant around.
If you want to edge your pond with rocks or stones, be sure to add at least one side with plants or grass, otherwise your baby frogs will fry on the stones in hot weather trying to get out of the pond.
SIZE ISN'T EVERYTHING
The size and shape of your pond is mainly a design concern and is up to you, but in order to maximise value to wildlife you should try to have a section within the pond that is at least 60 cm deep.
The short reason for this is so that the whole of the pond doesn’t freeze solid in winter (killing any overwintering wildlife). The long explanation is that water is at its most dense at 4 degrees C - this means that warm water sinks; this, together with the fact that ponds freeze from the surface down, means that if your pond is deep enough, then even in winter there'll be a balmy 4 degree hot tub at the bottom for your wildlife to camp out in.
If you can, it’s also good to make the pond big enough to have space for a shallower shelf around the edge, as well as the deeper section. This creates differing aquatic habitats - many pond-dwellers prefer shallow water to deep water, so don’t trouble yourself trying to tunnel to Australia. Shallower shelves also make it much easier for you to add aquatic plants, which is key to the health (and appearance) of your pond.
LIFE'S A BEACH
It’s super important that you build in a beach area to your pond. This not only looks cool, but gives a nice sloping entry and exit to the water for wildlife. The beach area is popular with invertebrates and means that hedgehogs won’t drown in the pond, which can happen with ponds with high sides (they love a swim!).
POND SHOPPING
I made my main wildlife pond using liner. There are other options out there - you can buy a pre-formed plastic pond that you sink into the ground (this is what my second pond is) or you can buy a large bucket and sink that into the ground.
Pre-formed ponds might look easier, but in my experience it’s quite difficult to get your hole the right size and depth to fit the pre-formed mould in. It also gives you less flexibility when it comes to design. Having said that, my pre-formed pond does have shallower shelves and a raised section one side to be used as a beach, so if you’d rather not come up with the shape yourself it’s definitely an option!
If you’re going to sink a bucket or other container, you need to think about how you are going to create shallow areas and entry and exit routes - you could pile up bricks or stones or add ramps.
For the rest of this article, I’ve focused on creating a pond using a liner, but if you’re using a pre-formed or a bucket, keep reading because most of the tips and tricks apply to all methods!
Here’s what you’ll need:
Something to mark out the shape of your pond (string, spray paint, etc)
A sharp spade
A hand trowel
A measuring tape
A long spirit level
A piece of wood or board that will span the width and length of your pond
Buckets (for transferring earth out of and away from where you’re digging)
A wheelbarrow (for the same reason)
Some pond underlining/underlay
This is white, fleecy stuff that goes underneath your main liner to protect from stones and roots. Whether it’s necessary is debatable, but most pond liners don’t offer a guarantee unless your pond is underlined.
Some sand (optional) - this can be used as well as or instead of underliner to help protect your main liner.
Pond liner
This varies from suspiciously cheap to eye-wateringly expensive, so the type you go for will depend on your budget. You really don’t want to have to rely on any guarantee offered by the manufacturer, because it’s little comfort when you’d have to drain and wreck your pond to replace the liner! Look at long-term reviews and pick the best one you can afford. I went for a mid-range one (it cost about £70 for a 6x4 ft pond). There are online calculators to help you work out what size liner and underlay you need.
Beach liner (optional) - I made making a beach easier by ordering some liner with a pebble top. I overlaid this on the beach section of my pond.
GETTING ON WITH IT: STEP BY STEP
Okay, so you’ve planned your size, shape, depth, shelves and beach - now what? Here’s the basic step-by-step for how I created my pond:
1. DRAWING
Draw out the pond over the grass or earth - you can do this with string, spray paint, markers - just make sure you know where you’re going to dig.
You might want to nip upstairs to look at your pond outline from an upstairs window, or leave your markers there a day or two to make sure you’re happy with the shape and location.
2. DIGGING
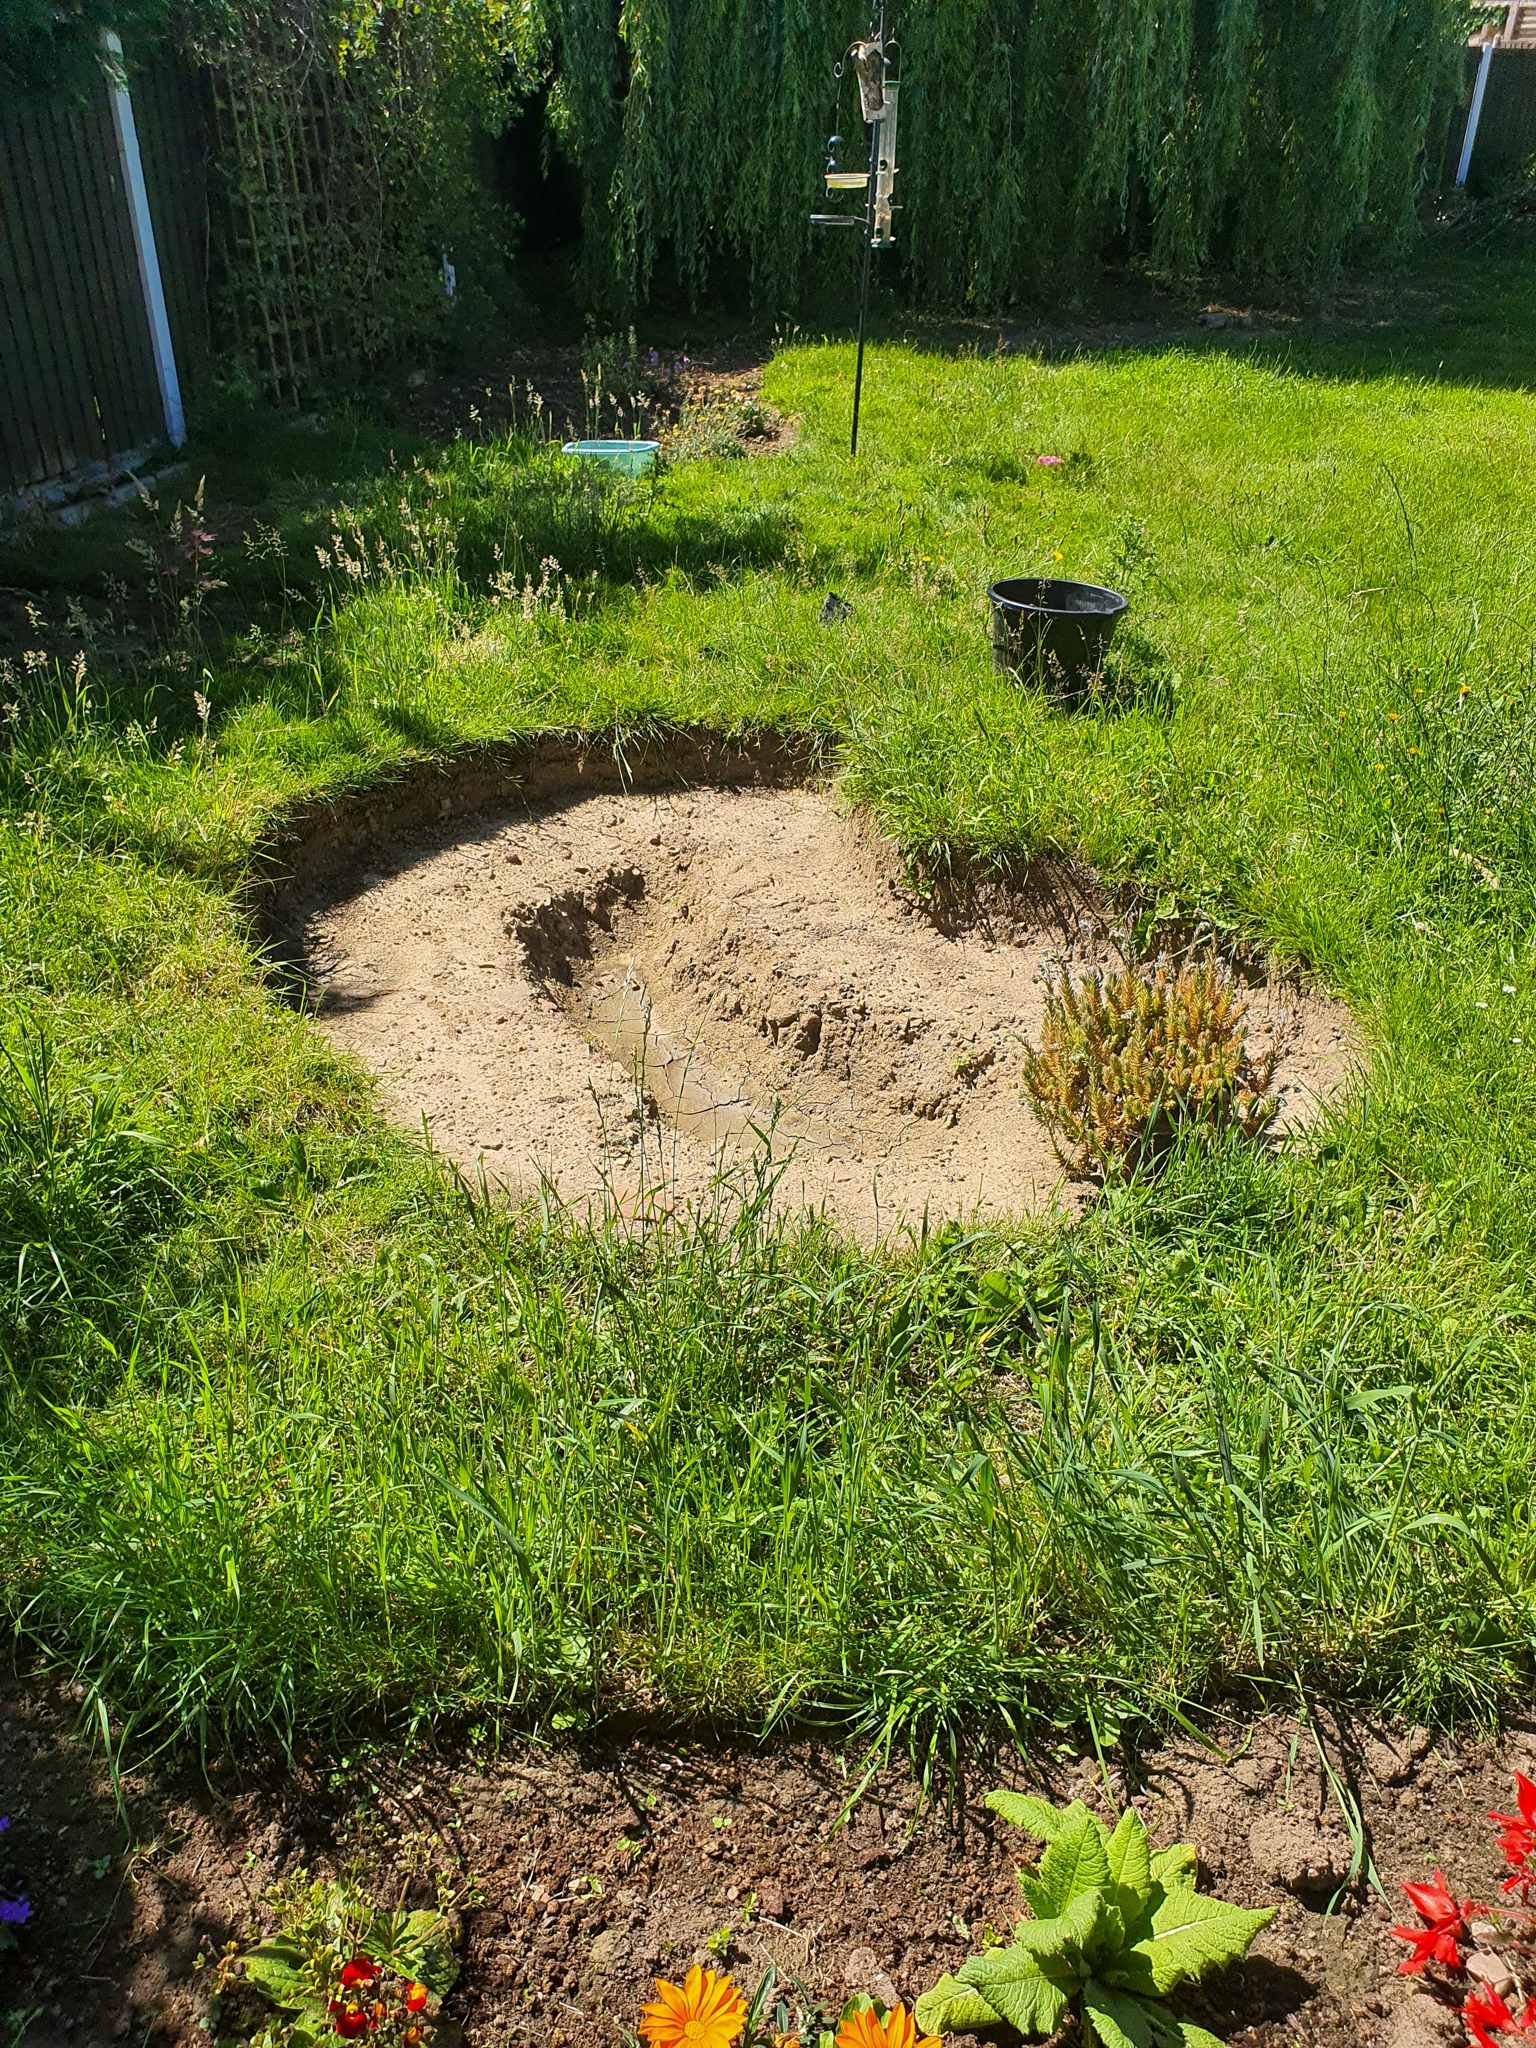
To state the blindingly obvious, your first real job is to dig the hole.
If you’re putting your pond somewhere with turf, put your spade into the pond all the way around the outside edge to cut the turf. Then, get your spade underneath the turf in the centre of the pond and lift it up and out until you’ve cleared the area where the water will be. Now, dig all of the pond to the depth of your shallow shelf. You want your shallow layer to be no deeper than 30 cm.
Remember if there’s grass around the edge of your pond, that the top of your pond will end below the turf, so allow an extra couple of inches - I didn’t do this, and had to take the liner back out to make it all deeper! Don’t forget that you’ll be adding underlay and liner (and sand if you’ve chosen to use it) and these will detract a few inches from your depth too.
3. BEACHING
For the beach, I found it easiest to dig an extra section outside the digging of the main pond. My beach is only a couple of inches deep - most of it is just a shelf where I removed the turf, with a slope into the main area of the pond.
You need a bit of a bump either coming from the pond to the beach or at the sides and end of the beach to ensure your pond-water doesn’t just leak out of the beach. Provided your beach is high enough (i.e. shallow enough) it should sit just above the ‘fill level’ of your pond, so won’t cause any leakage issues.
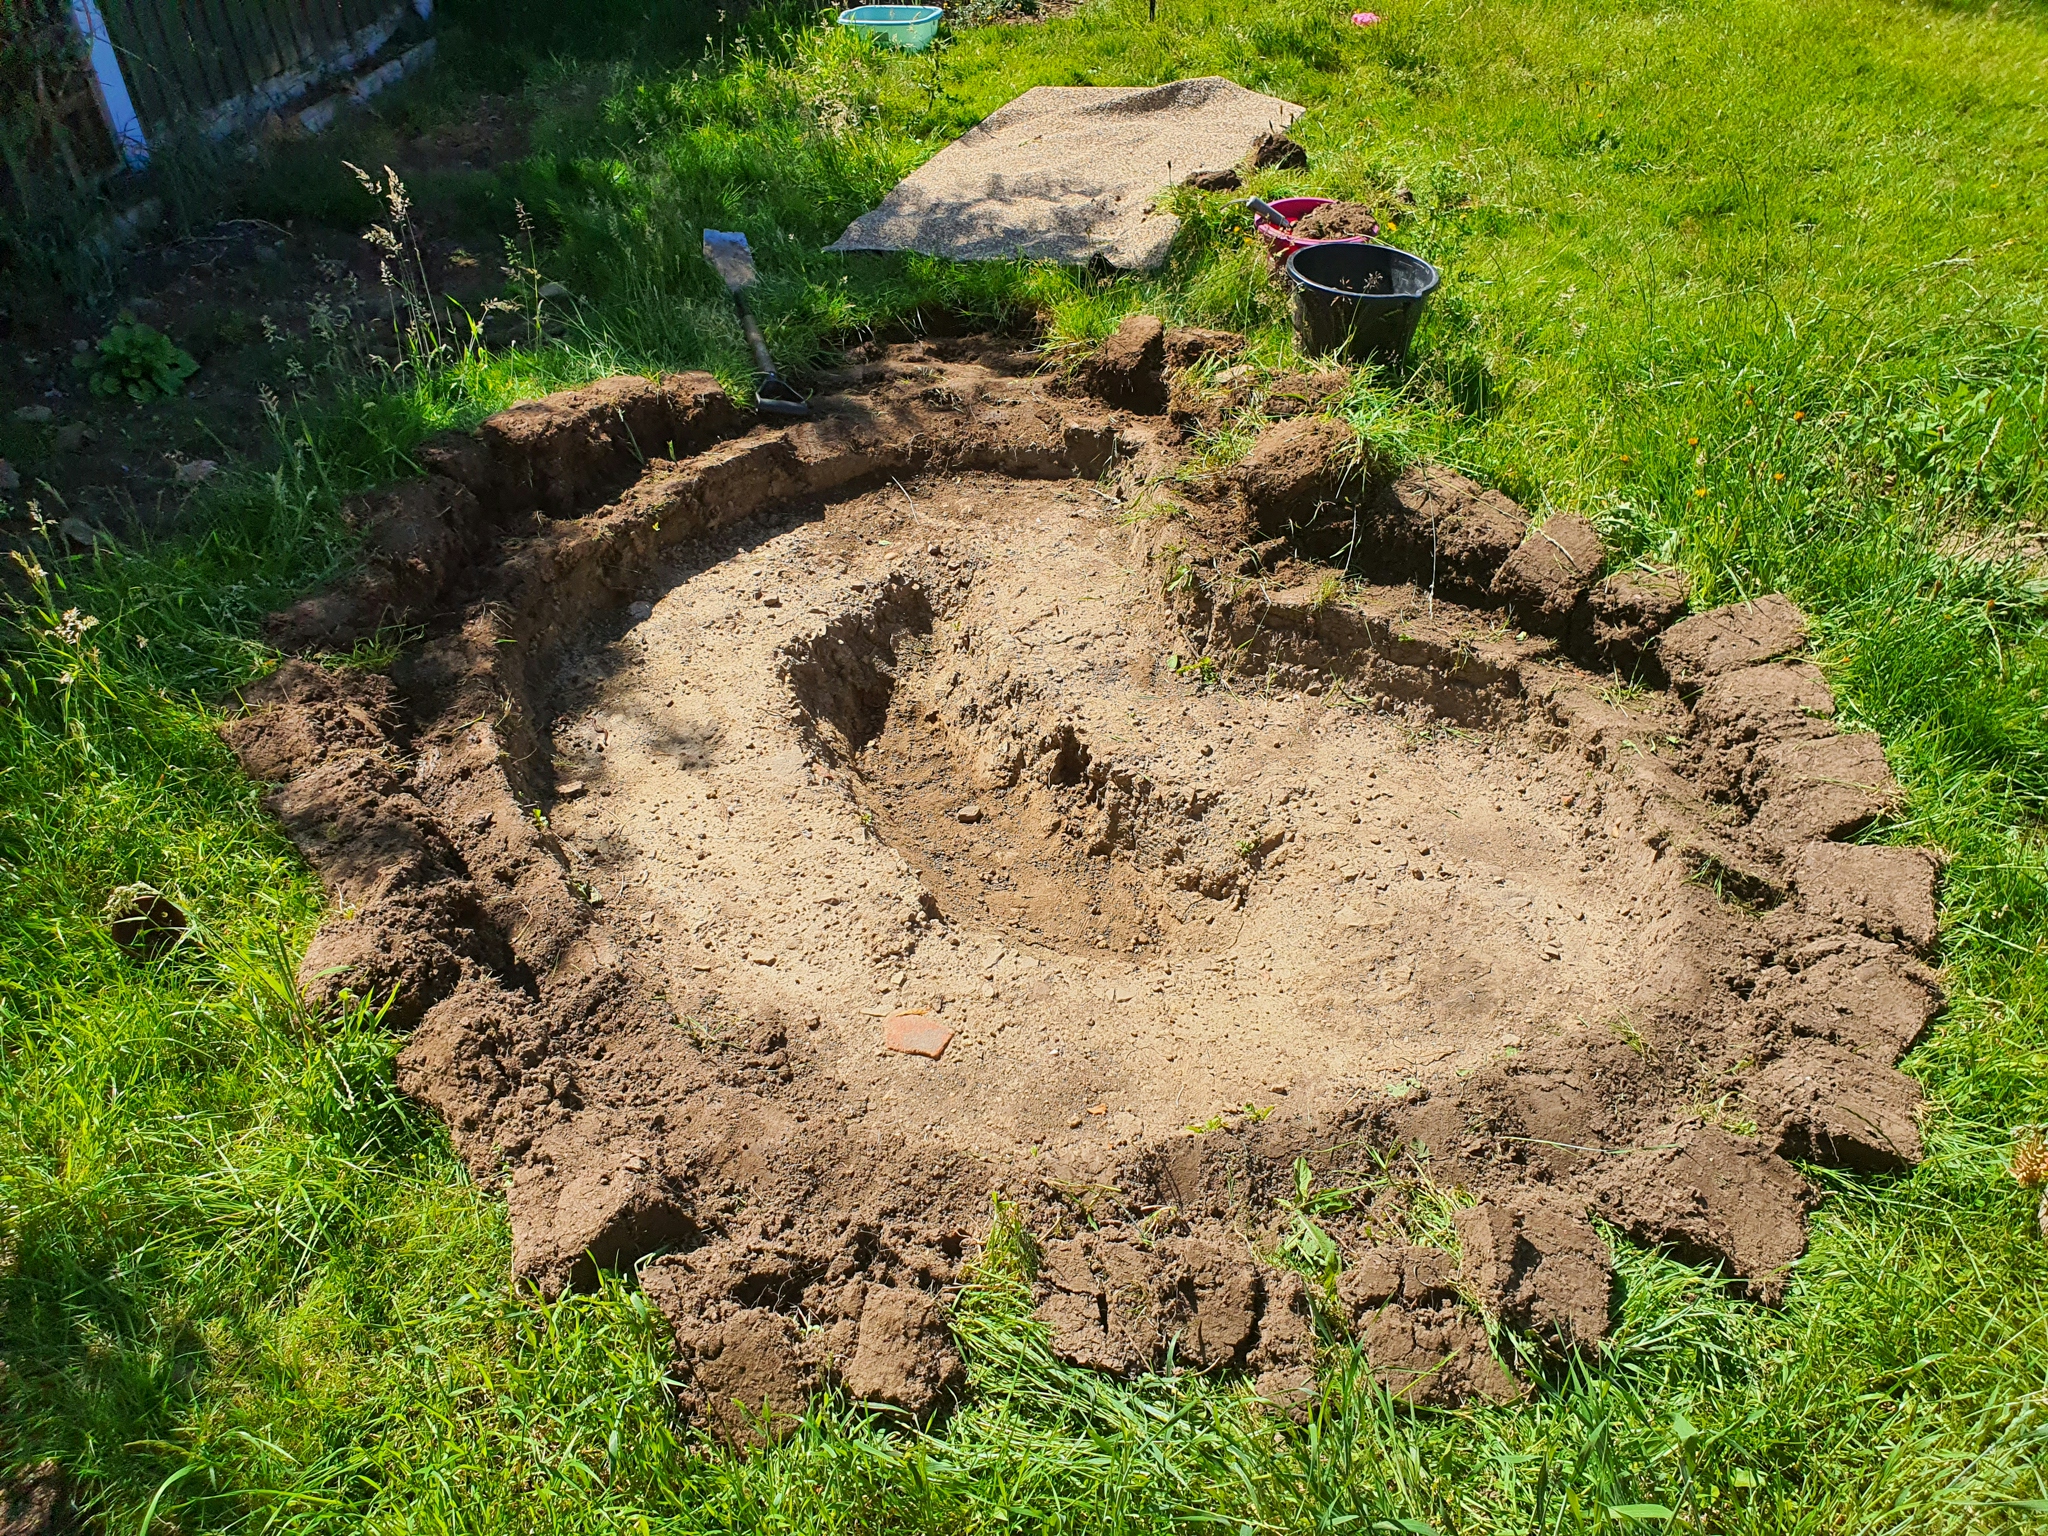
4. MORE DIGGING
Once you’ve got roughly to the depth of your shallow shelf, dig your deepest bit at the centre. This is the bit that should ideally be 60 cm deep (but doesn’t need to be much deeper). Again - don’t forget that if you’ve got grass round the edge of your pond, everything will end up a few inches shallower than it currently looks, and everything will be an additional few inches shallower because of the underlay and liner.
5. TURFING
Now, and this is the most important part to making your pond look good straight off the bat, you need to roll back the turf at the edges of the pond before you go any further.
This will allow you to tuck your liners underneath the turf, and will also let you flop the grass back down around the edge of the pond, making it look like the pond was always there and avoiding that messy mud-edged phase a lot of people seem to go through.
To peel back the turf, you need to make some cuts with your spade. First, go around the edge of the pond and make vertical cuts away from the pond that are the depth of your spade and are the width of your spade apart - what you’re trying to do is pre-cut areas of grass that will fit onto your spade.
Once you’ve done this all the way around, step into the pond and put your spade up against the edge, an inch or two below the turf. Push your spade into the earth underneath the turf and, if you’ve done your cuts properly, you should be able to lift up a piece of turf about the size of your spade. Angle the spade back to fold the turf back on itself, or just use your hands to pull it back.
6. MEASURING
When you’re happy with the general outline of your depths and shelves, double-check your depth measurements all the way round the pond.
To prevent leakage, it’s important that the sides of your pond are the same height (otherwise the water will leak out of the lower side and you’ll see the lining on the higher side).
To check this, you’ll need a long spirit level and a piece of wood or something big enough to span the width and length of your pond. Put the wood across your pond and put the spirit level on top - if it doesn’t come out as level, adjust the height of the side of your pond until it’s level both sides.
7. LEVELLING
Now you know you’ve got your depths right, spend some time levelling-off the bottom of the pond and the shelves.
Remove any stones from the walls or floor of your pond so that they don’t pierce your lining.
Try to make the bottom and the shelves smooth and level as this will make it easier to line without creases and will make your plants more stable when they’re on the shelves.
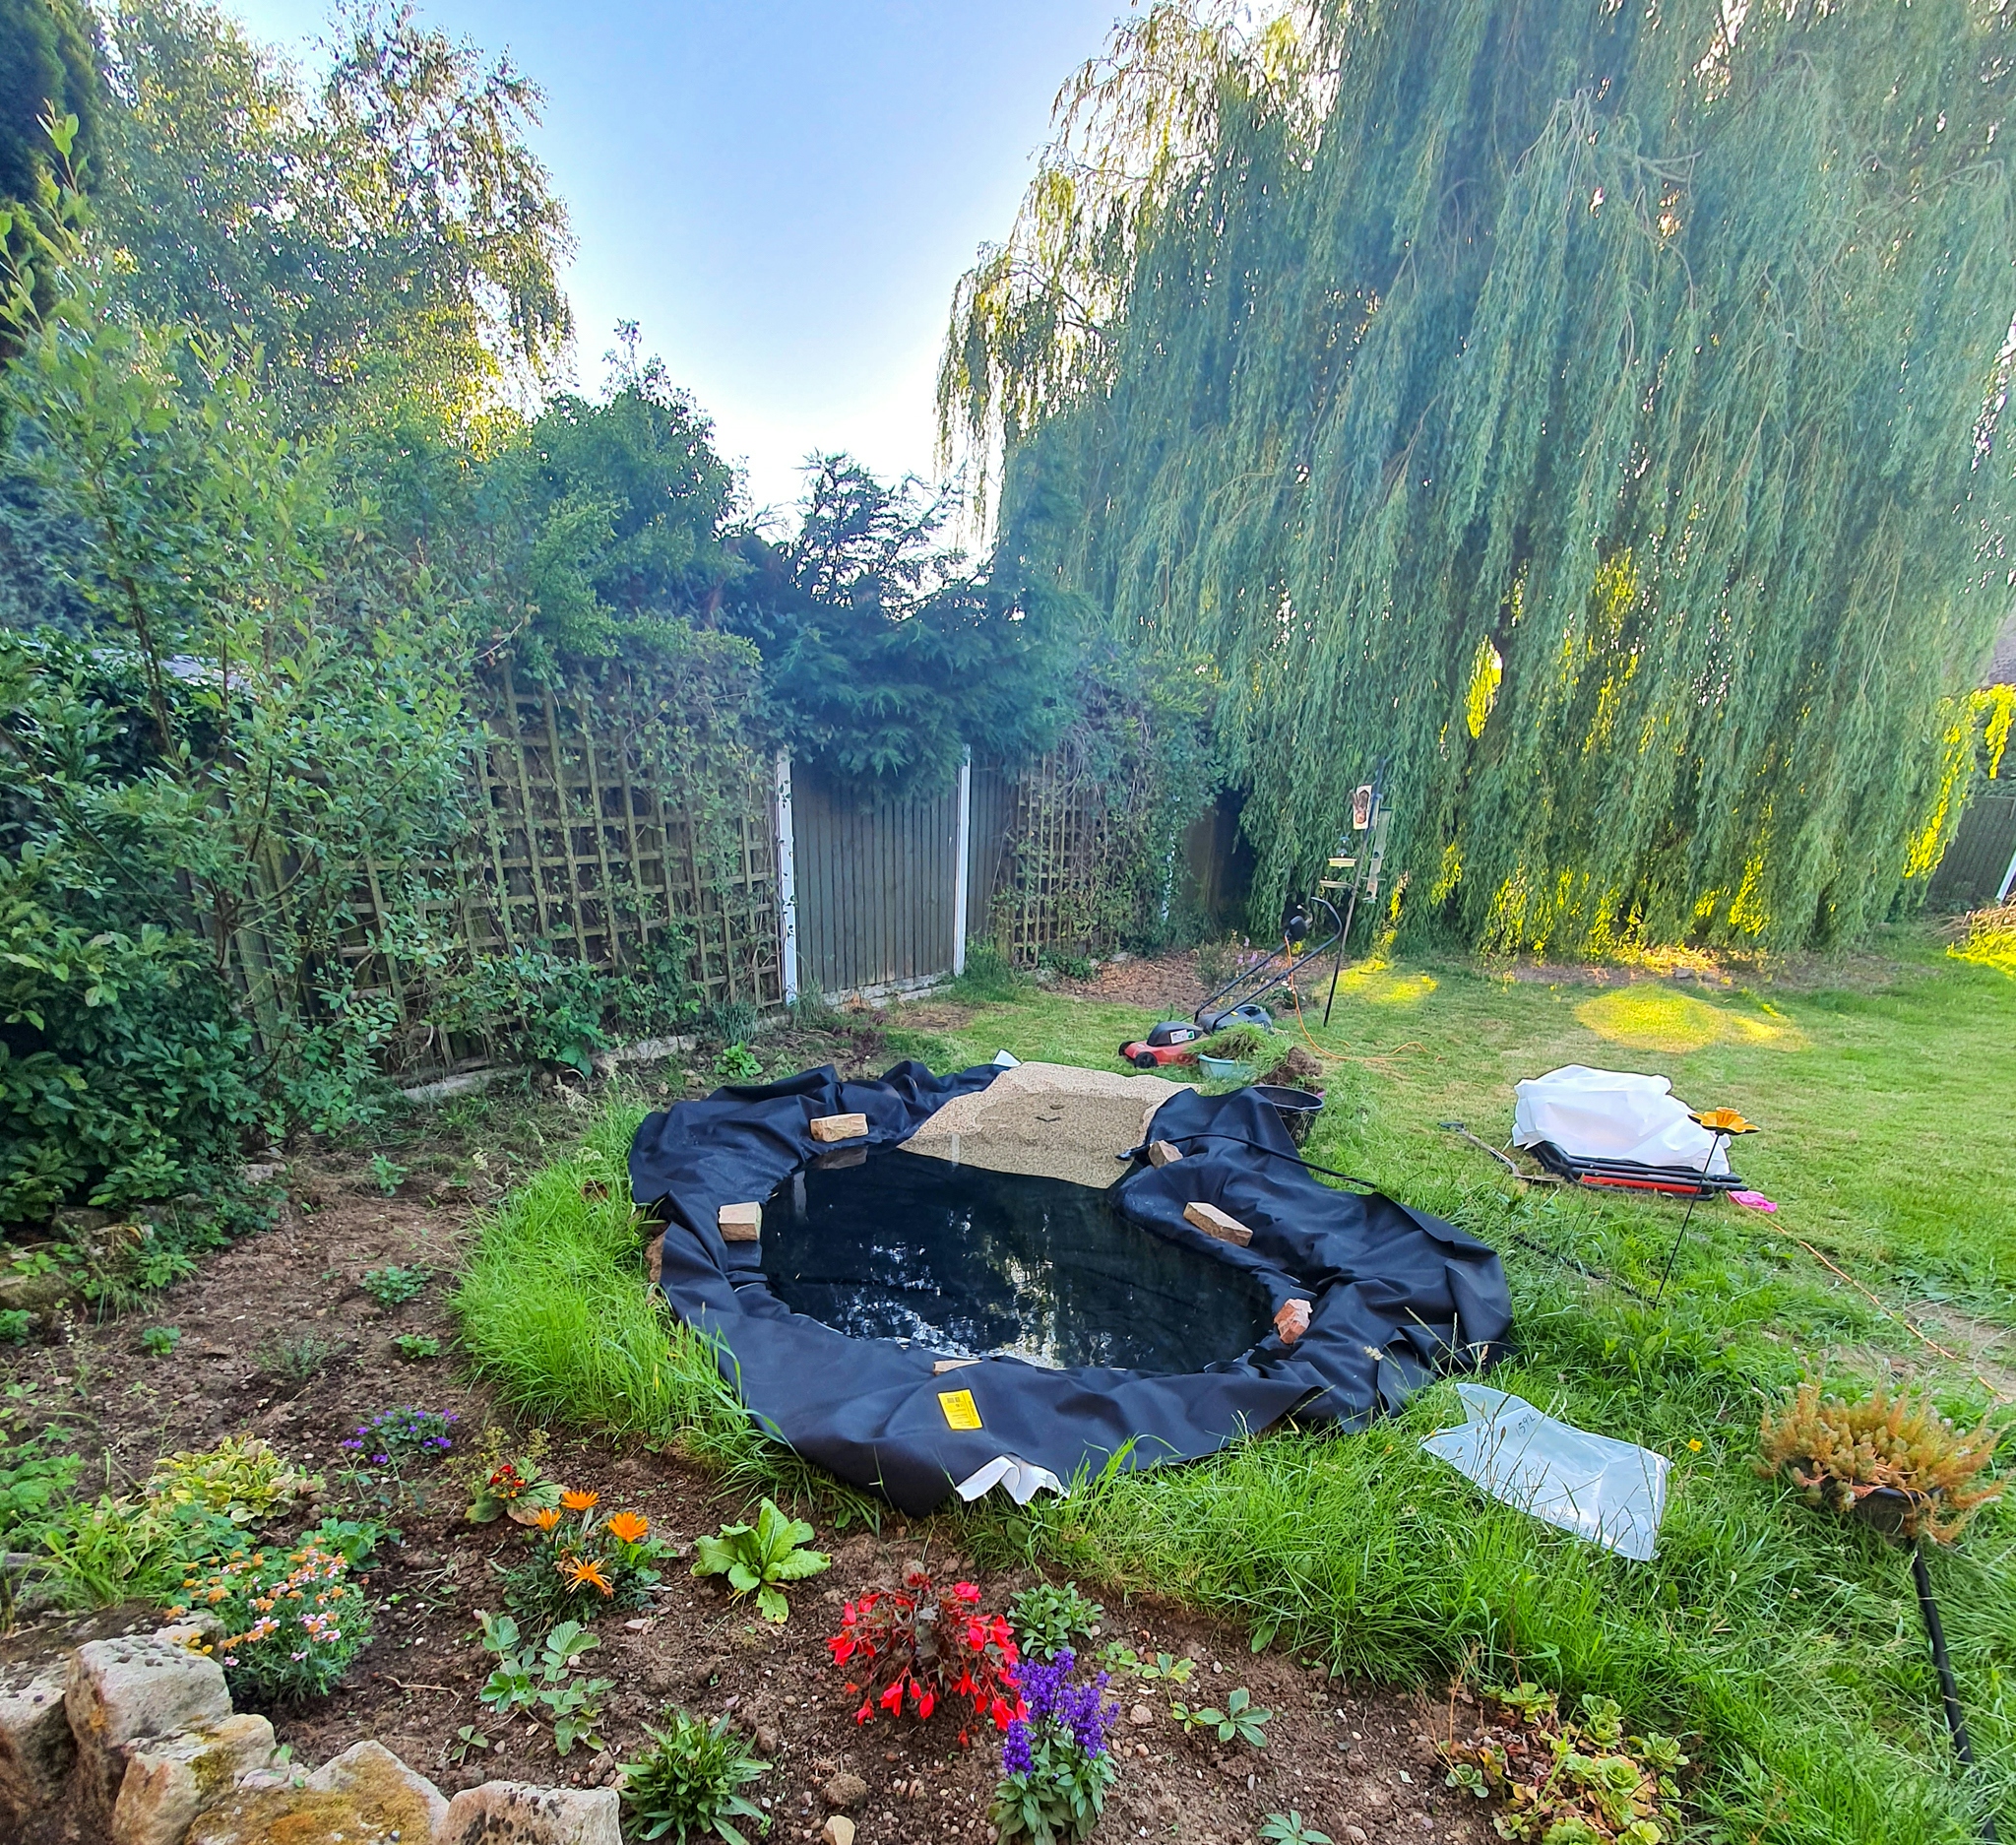
8. LINING
There’s no magic trick to doing your underlay and liner - just unroll it over the pond, then push it down into the edges. Do one at a time - get your underlay right before you start on the pond liner.
Try to get it as neat as possible and avoid creases by folding it at places where the shape of your pond makes it hard to get it flat.
Stand on the top of the underliner and pond liner in turn to make sure they’re pushed right down into the nooks and crannies of your pond. Leave excess underlay and liner around the edge. If it’s unwieldy, cut it a bit smaller, but remember to leave at least 30 cm around the edge for tucking in.
Add some temporary bricks or other weights around the top edge of your pond to stop the liner blowing in the wind or falling in one side under the weight of the water when the pond is filling.

9. TRENCHING
I’m not sure that’s a verb, but your next step is to dig little trenches to tuck your lining into.
Some people recommend securing your lining with stones but I think digging a little trench to tuck it into is much more effective, and achieves a more aesthetic result.
If you’ve got turf round the edge, you’ll be digging your trench into the earth below where you’ve pulled the turf back (this then allows you to fold the turf back over it).
If you’ve got bare earth or flower beds around your pond, you’ll be digging there. Your underlay and liner will go over the top of the edge of this pond and into the trench, so if you don't want a hump around your pond scrape away some of the earth between the pond and the trench (you'll put it back on top of the liner later).
Dig mini trenches about 20 cm from the edge of your pond. Dig them as deep and as wide as you like, but you only need them big enough to stuff the underlay and liner into.
The idea is that you bury the edge of the liner a little way back from the edge of your pond, and this keeps your liner in place. Try to make it so that the underlay and liner comes into your trench and curves along the bottom of your trench and up the other side before cutting it, rather than the very edge of your liner only just making it into your trench - basically, the more underlay and liner overhang that you can stuff into your little trench, the more secure it will be.
My trenches were about 20 cm deep and about 10 cm wide. After you’ve got your trenches right, loosen off or untuck the liner for the next (and most exciting!) step. Leave your temporary weights at the edges of the pond for the time being.
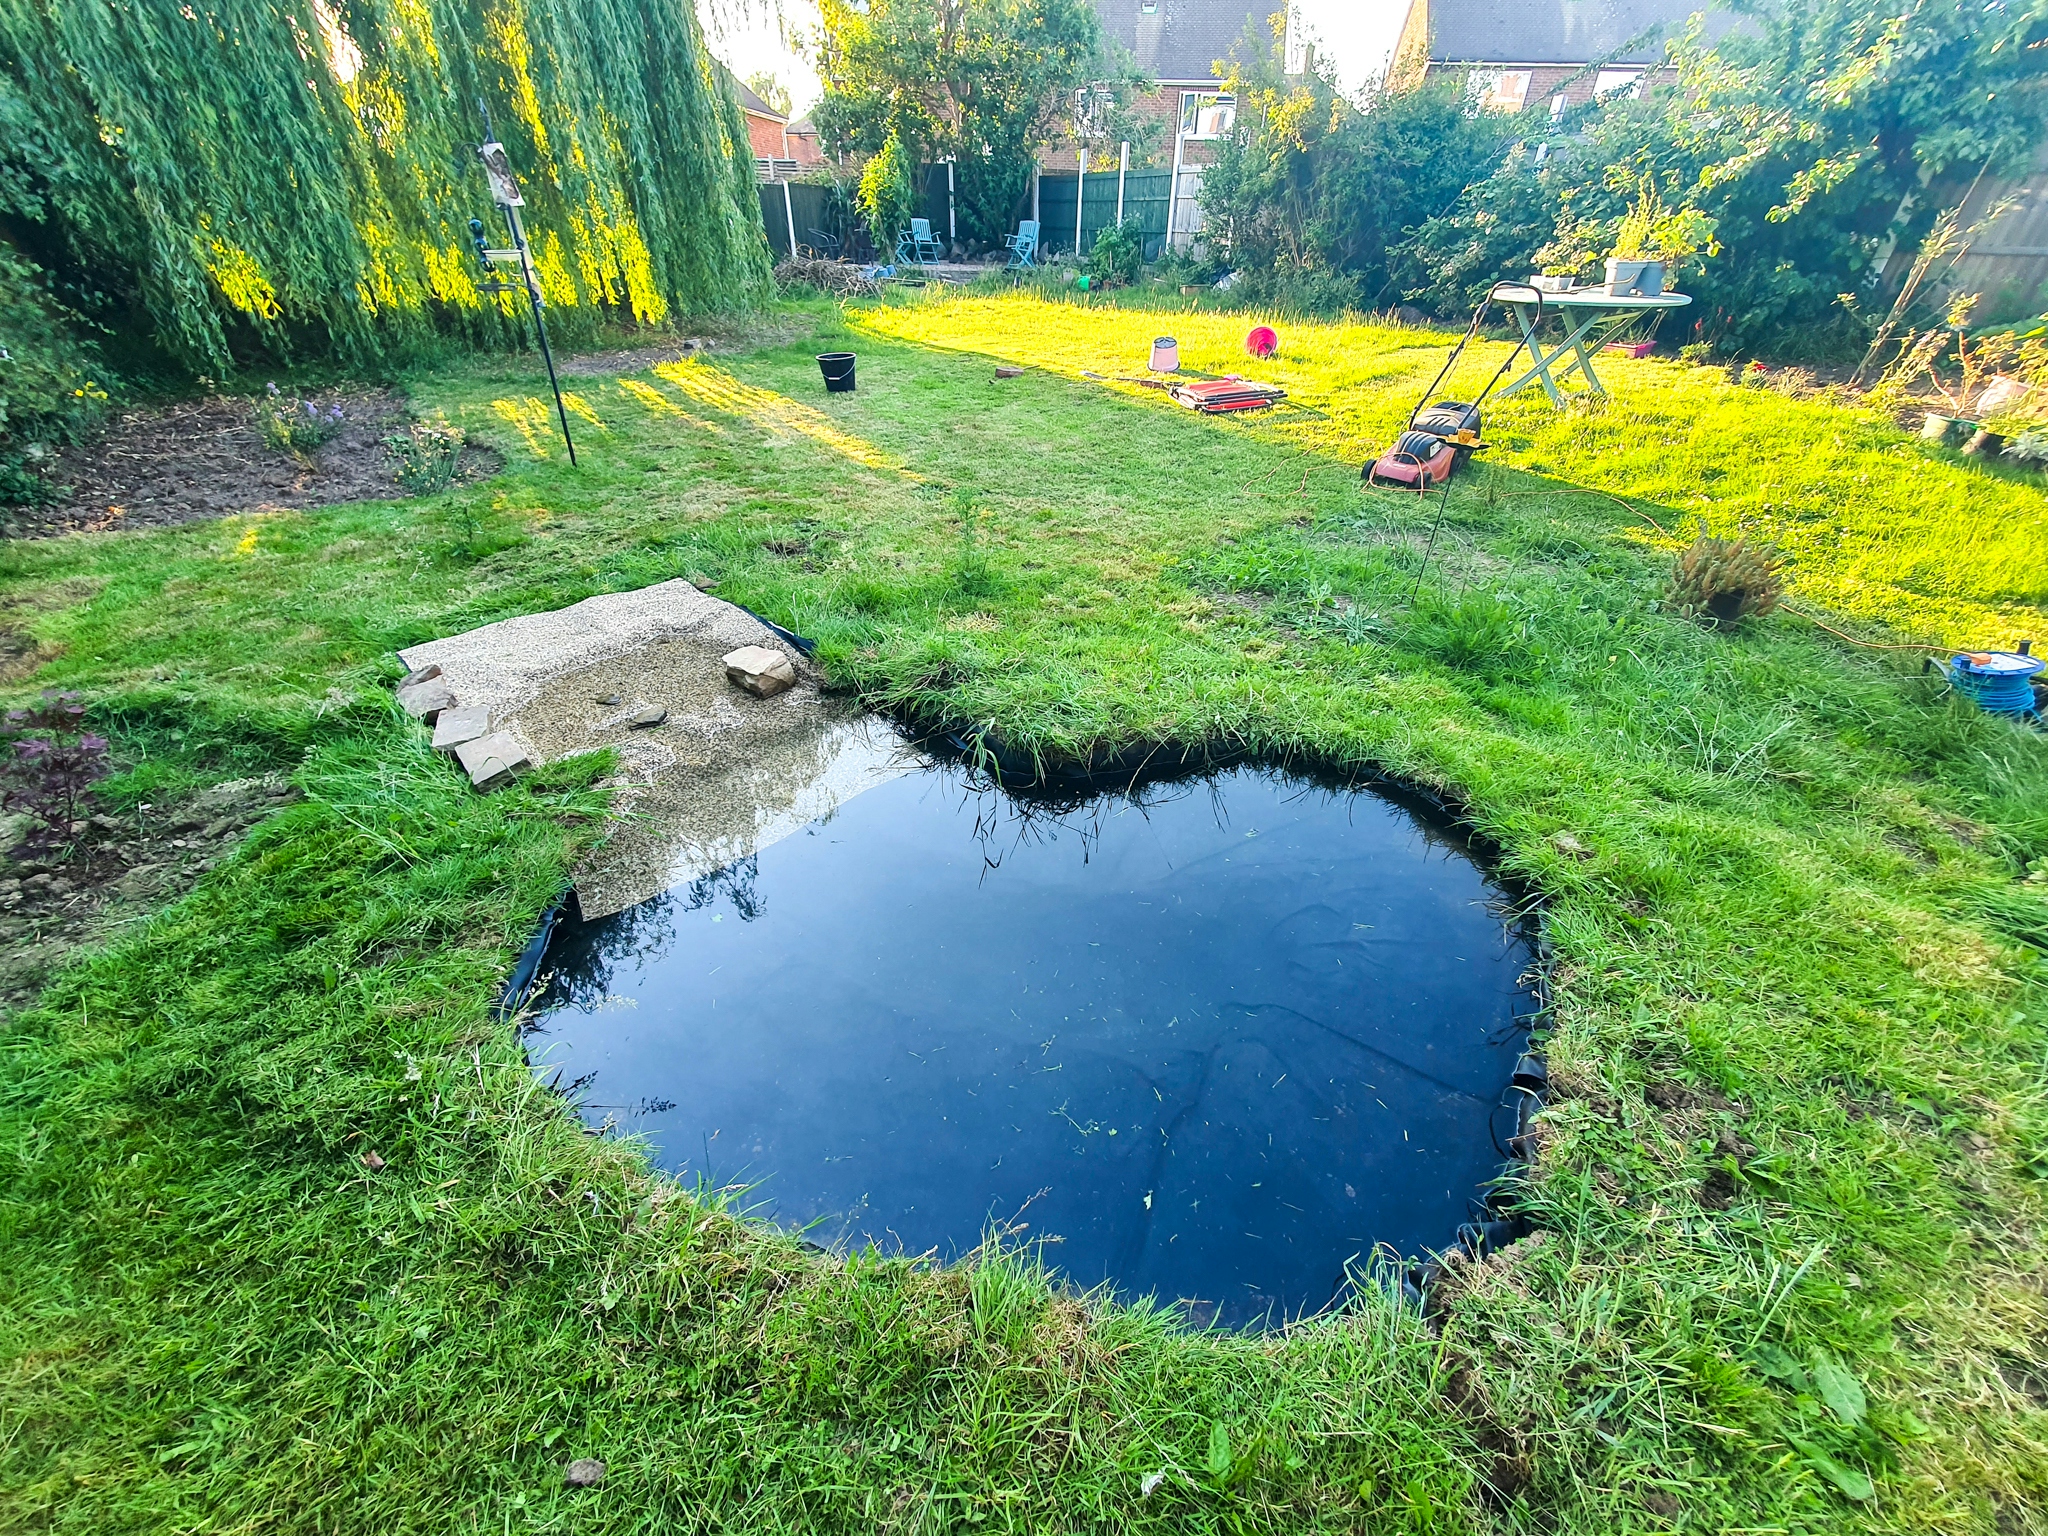
10. FILLING
Your liners will move and stretch with the weight of the water, so you need to fill your pond before you can finish it.
Don’t be put off by websites that say you must fill your pond with rainwater - if you’ve got a water butt, or you’re expecting heavy rain, then that’s ideal, but it’s absolutely fine to fill it using the hose, which is what I did.
Purists will tell you that tap water will be less inviting to wildlife or that it will turn your pond a funny colour, but I found neither of these to be the case - and unless you happen to have a water butt or have prepared a long time in advance for your pond, you’re unlikely to be able to get your hands on a pond’s worth of rainwater any time soon, even if you live in Wales!
While your pond is filling - and especially as it starts to become full - keep a careful eye on whether there's anywhere the water is leaking out. If you've done your levelling right this won't be an issue, but I found that part of the edge of my pond was slightly lower than the rest, which meant the pond level wasn't rising because it was leaking from the lower point.
You need to notice this now so that you can easily adjust the height of the sides - if you only notice it once you've tucked and buried your liner you'll be very annoyed!
If you do notice a leak, don't panic - just ease back the liner and underlay where the leak is (being careful to hold the water behind it as you pull it back) and add some soil beneath until it's the same height as the rest of the pond. Keep adjusting it until you're happy.
11. TUCKING IN
Once your pond is full and the lining has settled, tuck the edges of your underlay and lining back into your trenches. Stuff it as far down as you can and stuff as much into your trench as you can before cutting off any excess.
12. BURYING
Now, bury your trench. If you’ve got turf pulled back, just flip the turf over the top and voila! If you haven’t, put earth back into your trenches and pack it over the top, so that your tucked-in liner is secure.
If you’ve made your trenches deep enough and stuffed your underlay and liner in well, some packed-in soil on top is all you need. If your trenches were a bit shallow, your underlay and liner wasn’t behaving, or you’re just a bit of a worrier, you can add a few rocks or stones on top of the soil to make sure your edges aren’t going anywhere.
You shouldn’t be able to see any of your liner at all - except for the very edges of your pond above the water line.
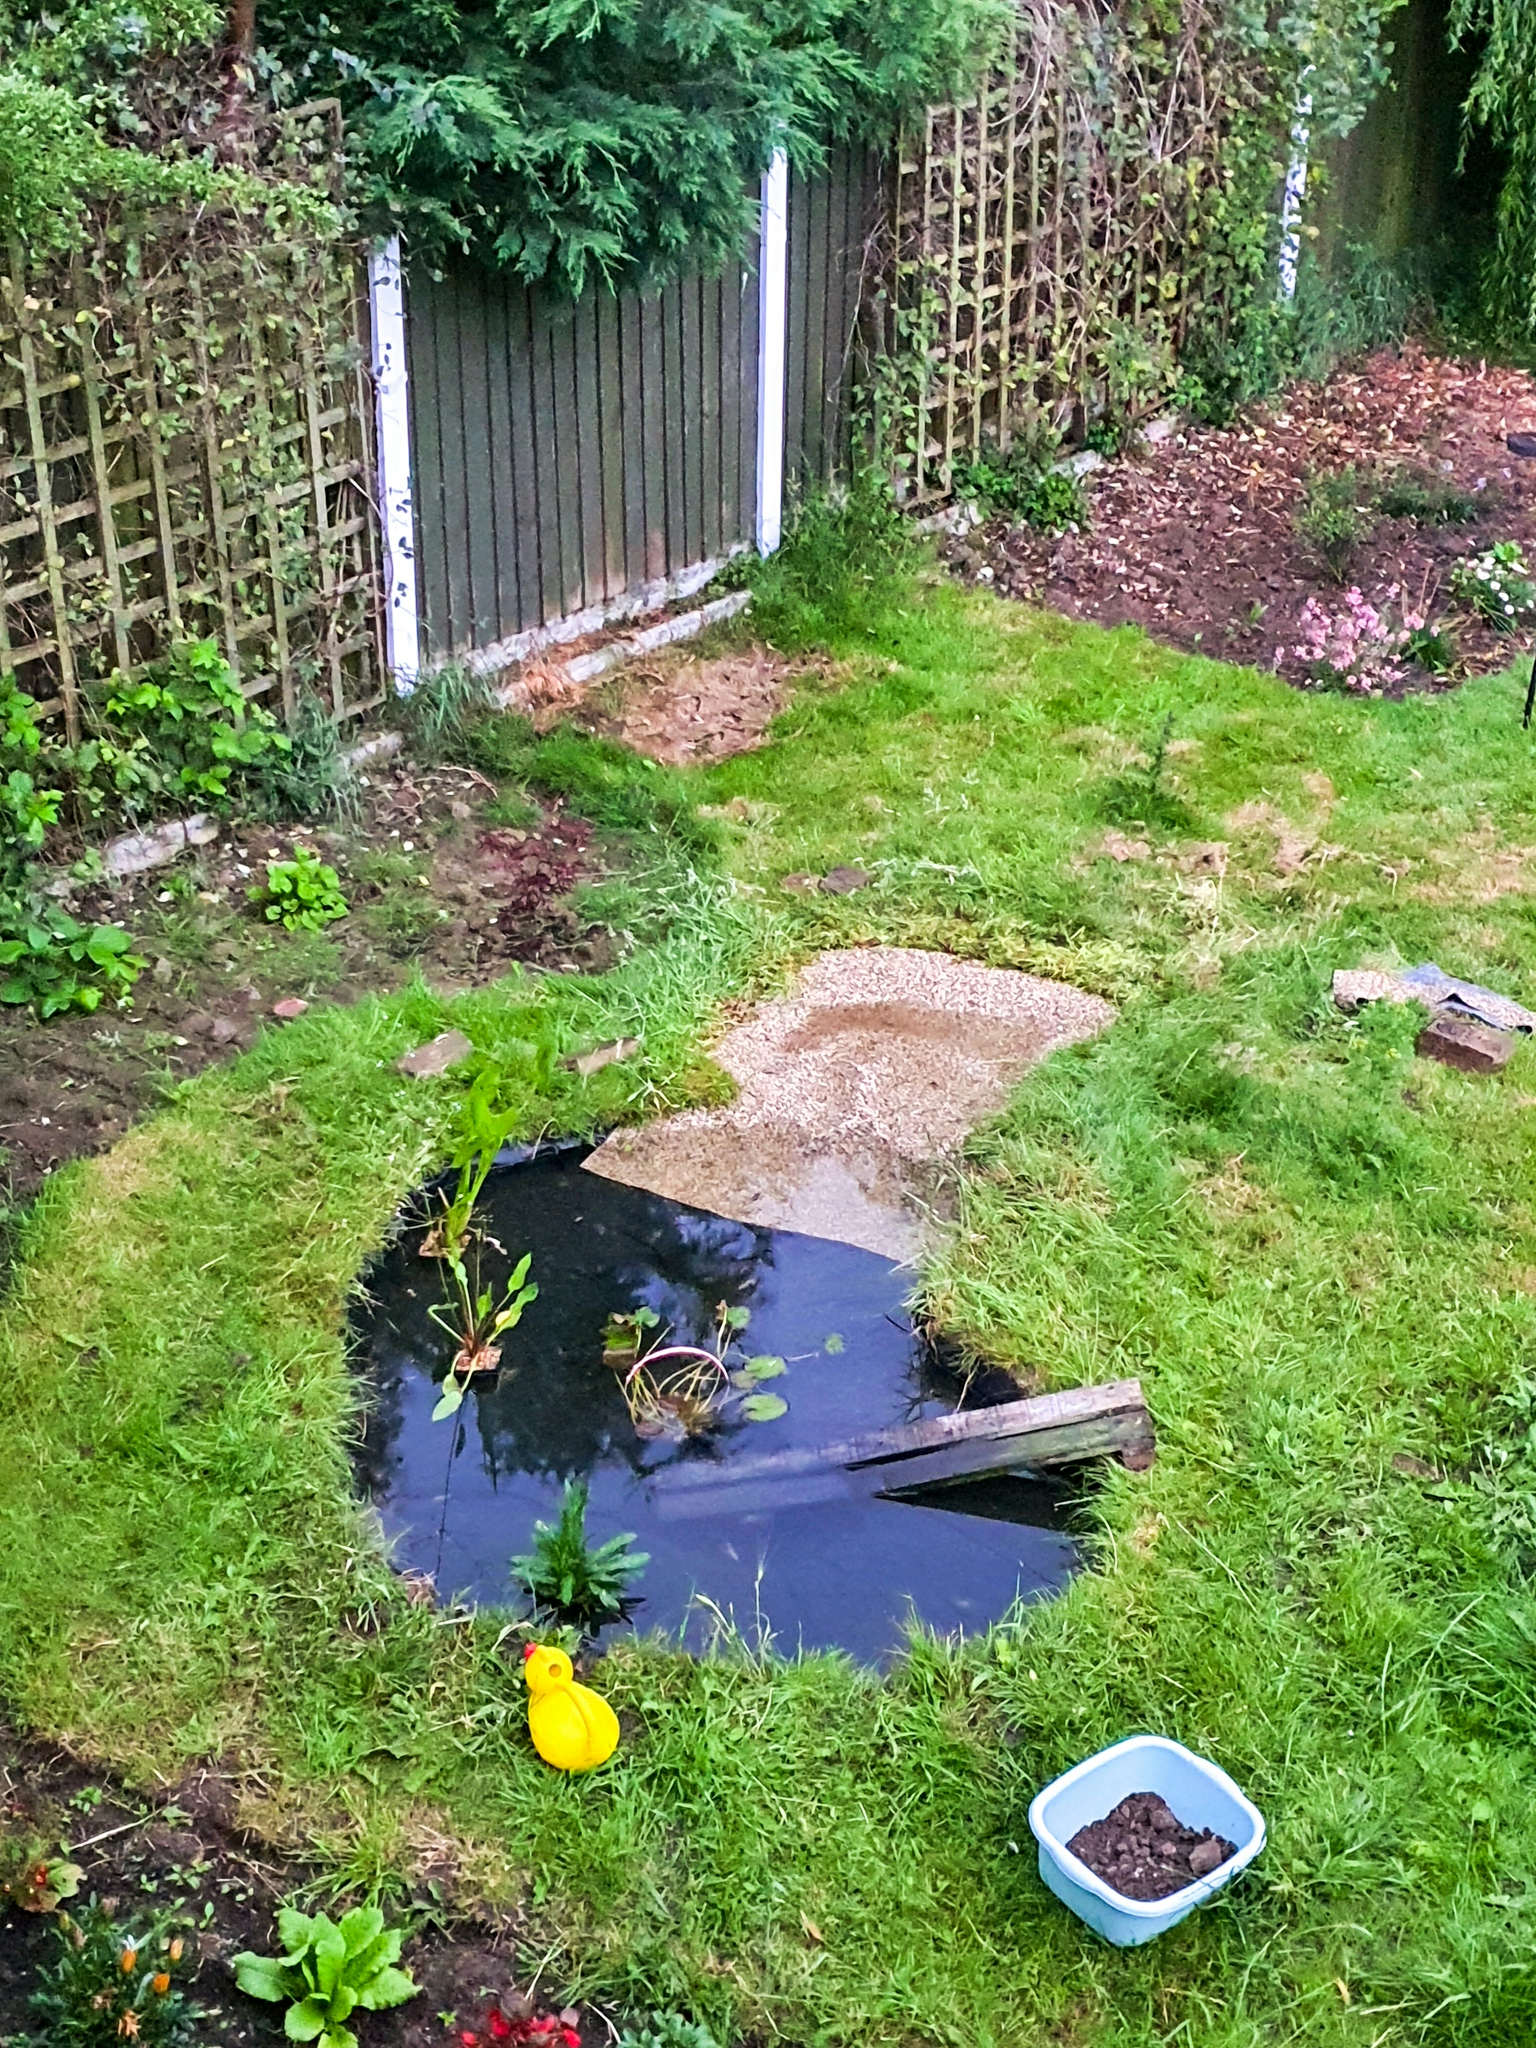
13. PLANTING
If you’ve ever left a container of water outdoors then come back to it weeks later, you’ll know that sitting water goes stagnant - and it STINKS! So why don’t ponds go stagnant?
The answer is plants! Aquatic plants oxygenate the water and they consume nutrients in your pond - this is what keeps the water clear, as a build up of unused nutrients can cause the water to turn green or brown.
Pond plants also provide shade and hiding places for wildlife and compete with some problematic pond life - like blanket weed and algae (which are both fine in manageable quantities but can overwhelm a pond if they have free rein).
In terms of what to plant, there is something of a raging debate going on between conservationists as to the importance of using native plants - some argue it’s essential, others say that any plants are better for our native wildlife than no plants so people shouldn’t be so fussy.
In general, if you have the choice between native and non-native, it’s best to buy native plants - this is because native wildlife has evolved with those plants close by, so it’s more likely that the plants will be beneficial to them.
In either case, there are some invasive non-native species of aquatic plant that you definitely need to avoid - see the links in the resources section for some lists of plants to plant and plants to avoid.
You’ll be thrilled to know that we do have native species of everyone’s favourite pond plant, the water lily!
14. RAMPING
Okay, my verb theme is getting a bit tenuous again, but what I mean here is that you need to put a ramp in your pond!
“But Hayley, I’ve already got a beach!” I hear you yell - yes, I know. You did a great job of following the other steps. But even if you’ve got a beach, having a ramp is still great - I have a large beach on one side of my pond, but birds and squirrels still use my wooden ramp into the deeper section to bathe and drink, and it adds an extra level of comfort that hedgehogs will be able to get out of your pond and won’t drown. It’s also a great landing place for wildlife like dragonflies and hoverflies, and provides shade below which is where my frogs are usually hanging out!
15. ENJOYING
You’ve filled your pond, you’ve planted it, and you’ve made sure it’s wildlife-friendly, now’s the time to sit back and ENJOY IT!
Studies have shown that being by water (even small areas of water) is good for your mental health, and I firmly believe that effect is generated even by a small garden pond.
Life will probably arrive in your pond within days, so spend some time near your pond and prepare to wonder at how quickly it comes alive. There are so many ways to engage with your pond life - you could try macro (close-up) photography or videography, set up a trail cam (motion-censored camera) to see who’s using your pond while you’re at work or at night, start a survey of the creatures you find, sit bat-watching or hedgehog-watching (or even badger- or fox-watching) in the evenings, create artwork using your pond and its residents as subjects, or get the kids involved in pond-dipping!
But failing any of that, stick a comfy chair somewhere nearby, take your cup of tea outside and watch the pond life go by.
Were these steps helpful? Are there any shortcuts or secrets I’ve missed? Have you created a wildlife pond? Let me know on socials (links at the bottom of the page), and show me your amazing ponds!
RESOURCES
Gardeners' World list of native pond plants: https://www.gardenersworld.com/plants/native-plants-for-wildlife-ponds/
WWT guide to native pond plants: https://www.wwt.org.uk/discover-wetlands/gardening-for-wetlands/a-guide-to-native-pond-plants/
Share with your friends
Subscribe to learn more
Join me in learning about our natural world and how we can protect and restore it. Get notified on my latest posts and a monthly newsletter on wider conversation topics for us to chat about.
Recent Posts
If you enjoyed this one, then you might like these too.